
As a part of Startwebsiteonline series in the last tutorial, I have explained How to choose a domain name for your business website.
Well, guys now you have decided to purchase hosting for your business website. In this tutorial, I am going to share How to Purchase a Domain Name and Hosting With Bluehost. For beginners who are starting their website, I highly suggest Bluehost or Siteground Hosting.
You may be thinking there are many hosting companies out there but why this 2 companies. The reason is I have tried and tested both the hosting and they are simply superb. Both the hosting companies support is also good. With Bluehost, you can get FREE DOMAIN + FREE SSL + BACKUPS.
Note: I highly recommend you to not go with FREE Hosting or Cheap Hosting Sites especially Godaddy Hosting.
Well now in this tutorial, I will show how to purchase hosting from Bluehost.
But before starting, let me tell you why you need hosting and its importance with a short video.
How to Purchase a Domain Name and Hosting With Bluehost
Table of Contents
Step 1: Go to Bluehost.com
Normally if you purchase directly you may not get a discount.
You will be taken to this page.

Step 2: Select the best plan from Bluehost
You will have 3 plans to choose from.
Well, let me explain to you this 3 plans.
Basic: If you want to host just 1 website then select this plan.
Plus: If you want to host more than 1 website then select this plan.
Prime: If you are having huge traffic on your website then go for this plan.
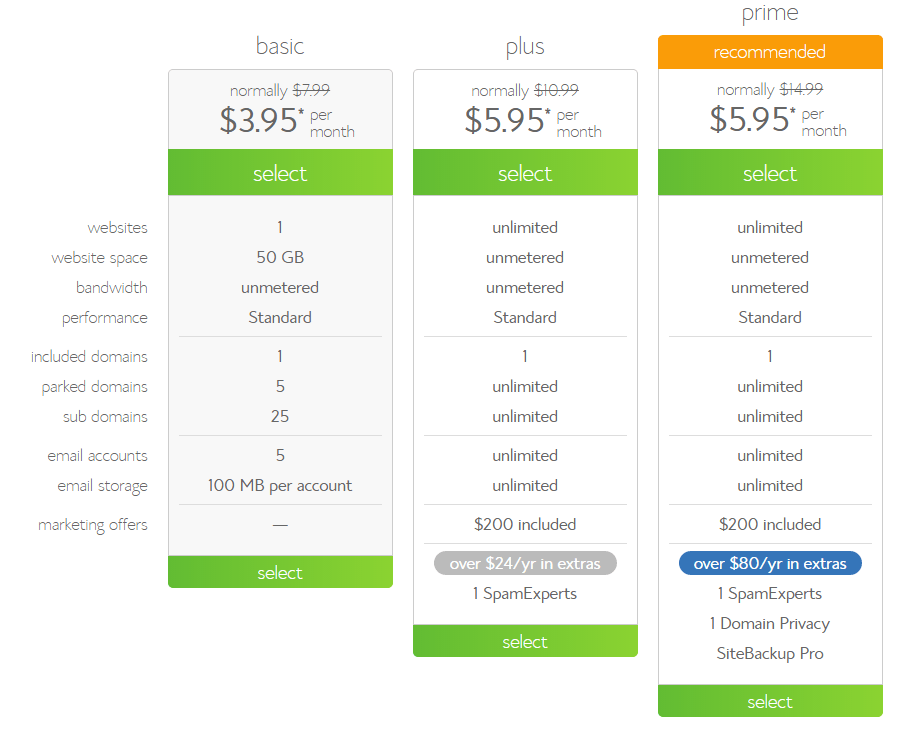
I would to either to go with Basic or Plus plan for your business website. These features are quite enough for you to start a website.
So now let’s get started selecting the Basic plan in this tutorial.
Step 3: Get the domain name for FREE
Here in this step, you can get the domain name for FREE.
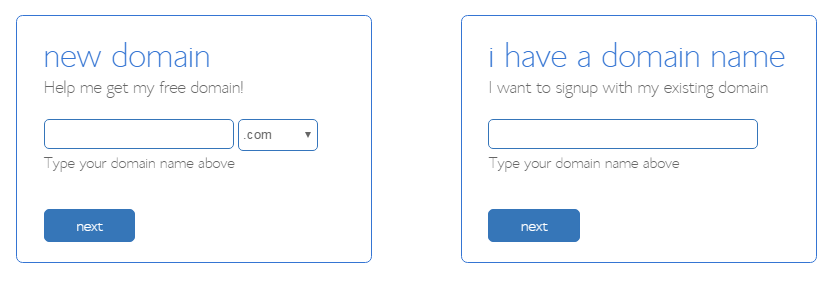 As I said we can get the domain name for FREE. Enter your domain name in “new domain” and click on “next”
Or if you have already have a domain enter in “I have a domain name” section.
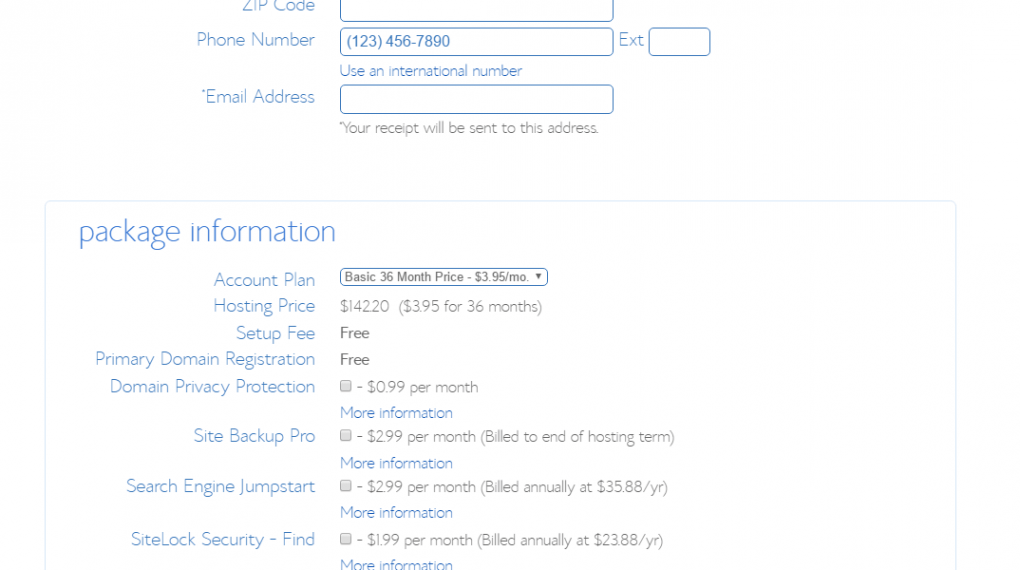
Step 4: Enter your billing details.
Uncheck the boxes which I am unchecking which are not necessary. If you feel its important you can check it.
Step 5: Special Tip to SAVE MORE
Wait for 2-3 minutes on the billing page. You will get more discount. Usually, Bluehost runs this often and this can save you some bucks.
This special trick works only on desktop and I am sharing this trick for my readers.

After getting a discount check the terms and conditions and click on “submit”
Now you have successfully purchased hosting from Bluehost with a discount+FREE Domain. So this was the complete tutorial on “How to Purchase a Domain Name and Hosting With Bluehost“.
Video Tutorial
Note: This page contains affiliate links. That means if you make a purchase through the links mentioned, I will get a small commission at no extra cost to you. This helps me in maintaining this blog and also write more useful articles.